Preparation
Before reading this page you will need to have a copy of the training almanac and chart (and a real one if possible).
You will need to be happy calculating Dead Reckoning (DR) positions including Leeway, tidal streams and converting between magnetic and true north.
Why is this important?
If you are out of sight of land and you don’t have a GPS this is the next best way of estimating your position. Like Dead Reckoning it takes account of your course and distance travelled but also takes into account the tide acting on you.
The information we need
You will need to know the direction you have travelled, the amount of leeway, the distance you have travelled and the tidal current that has acted on you over that time.
We start by finding our DR position if you are unsure how to do this see our Dead Reckoning webpage.
Using the same example as on the Dead Reckoning webpage, at 16:10 we start our journey at a known location, 46o 11.8’N 006o 20.2’W and we start sailing on a course of 146oM.
At 16:10 the log (distance measuring device) reads 10.0Nm an hour later it reads 16.5Nm. We have therefore travelled 6.5Nm in one hour.
We can use this information to plot a DR position at 17:10 which is fine as long as there is no tidal current. So if you are in a sea area with very little tide it is fine. If you need to revise how to plot a DR position see theDead Reckoning webpage.
However, if the tide is running at 1.5 knots on a course of 118o true we can use this information to improve our DR position by adding the effect of the tide.
Plotting our Estimated Position (EP)
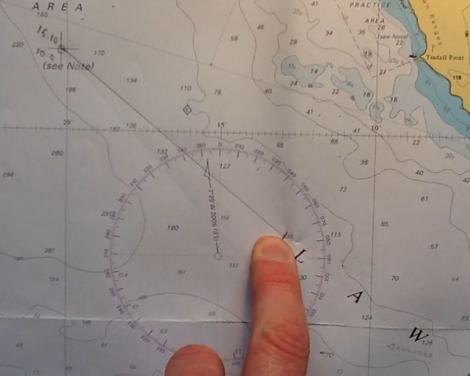
First, we set our plotted to the direction of the tide (in this case 118o true) and then draw a line from the DR position in this direction.
As the 1.5 knots of tide has been acting on the boat for one hour it would have pushed to boat 1.5Nm. We, therefore, measure, using our dividers 1.5Nm along the direction of the line.
This gives us our Estimated Position (EP). This is marks by a triangle with a point (the EP) in the middle.
We add the time and the log reading to the chart alongside the EP position. We then draw three arrows along the line representing the tide and one arrow on the line representing our direction or travel and distance of travel. These notations are to help the next person who reads the chart (which might not be you).
To see the whole method explained watch this video.
Video: skill
Calculating the tidal stream
In a real life situation, you will not be simply given the tide speed and direction but will need to calculate it using the method shown on the tidal stream webpage.
Links
Estimated Position Examples
This is a link to a number of Estimated Position examples, with answers.Warning: The archived examples do not use the current training charts.
Progression
Keep practising this method and don’t confuse it with Course to Steer.
If you are doing the Yachtmaster course this same method is used to calculate Projected EPs.
Feedback
The content of these pages is put together in good faith and is constantly evolving. It is possible that errors exist within this content. If you spot an error or would like to add anything to these pages please contact use via email.
Reading the content of these pages is not a substitute for completing a RYA Shorebased course or similar.


