Preparation
Before reading this page you will need to have a copy of the training almanac and chart (and a real one if possible).
You will need to be competent converting between magnetic and true north.
Why is this important?
If the GPS fails or the batteries run out here are a few methods for finding your position.
Using a handbearing compass
Before using a handbearing compass remember it will only work correctly if clear of all all magnetic effects, this includes glasses, mobile phones and radios.
Before you look across the compass make sure you have a firm footing and/or you have a strong hand hold. It is easy to lose you balance when focusing on the compass.
For the most accurate results plan the objects you are taking a bearing of in advance and if you are using the objects for a fix ensure they are clearly marked on the chart.
Write down the bearings as soon as they are taken or even better call out the bearings and get some else to write them down.
3 Point Fixes
To fix your position you could simply take two bearings from charted objects (making sure you have identified the correct objects) and then adjust these bearings for variation and plot the lines on your chart. If you have taken perfect bearings and made no mistakes the point where the two lines cross is your location.
However, in the real world on a moving boat we are not going to take prefect measurements every time and it is easy to make a simple mistake (like adding the variation when you should have subtracted or vice-versa).
To achieve the best fix possible follow these simple rules:
– find three charted objects on the chart and in reality (the third is to check)
– the ideal arrangement of measurements is two at near right angles and the third cutting through the lines midway (as shown below) – try your best on this one, it is not always possible.
– take all the measurements in one go as quick as possible after one another.
– take the bearings nearest the bow or stern first (as they change slowest) and bearings nearest the beam last (as they will be changing fastest).
Don’t expect your real life fix to look like the one in the diagram above as this is hard to achieve (although examples plotted from the RYA examples might).
You are more likely to get a “cocked hat” or triangle (as below). In this case you should in general assume you are in the corner closest to danger and even then bear in mind that your position is more than likely outside the cocked hat.
Bearing and Depth Fix
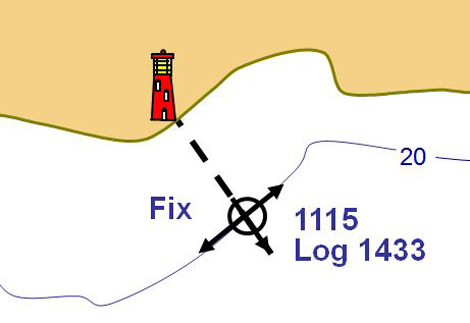
In the absence of three or even two charted objects you can use one bearing line and fix your position using your depth sounder (as in the diagram below).
You should be careful when using this method in areas of complex seabed where a bearing line might cut through a number of suitable contour lines.
Transit Lines
Now have a look at this video from Motor Boat & Yachting
Video: skill
Links
Sail Train: 3 Point Fixes & Fixes using depth
An explanation of how to complete a 3 point fix and some question to practise.
Check your understanding

Check your knowledge of the basics using this quick self-marking test.
Open the quiz
Progression
Practise using this method in the real world to help remember to process (you don’t have to be at sea to do this, go to the top of a hill and use an OS map).
Feedback
The content of these pages is put together in good faith and is constantly evolving. It is possible that errors exist within this content. If you spot an error or would like to add anything to these pages please contact use via email.
Reading the content of these pages is not a substitute for completing a RYA Shorebased course or similar.


